Henna art, or inai, has a timeless beauty and deep cultural significance. It’s been around for centuries, and for good reason.
But let’s be real, those complex patterns can be intimidating. Especially if you’re just starting out.
That’s where inai simple cantik comes in. It’s all about achieving stunning, elegant results with designs that are easy to master.
You’ll find everything here to get started, inspiration, practical steps, the essentials. And honestly? You’ll be doing your own henna art at home faster than you’d think.
Remember, the beauty in henna often lies in simplicity and clean lines. These are perfect for newcomers. So,
Your essential toolkit: what you need for perfect henna
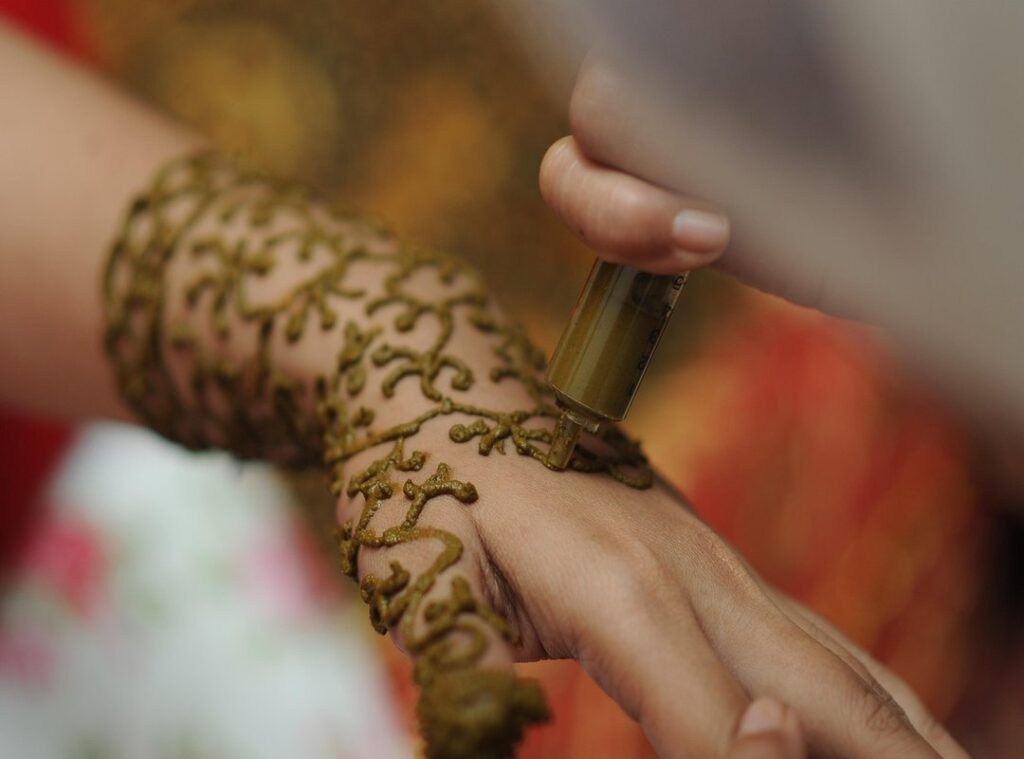
Let’s start with what matters most: high-quality, natural henna cones. They work. Natural henna smells earthy and comes out as a greenish-brown paste.
Avoid anything labeled as “black henna” because it often contains harmful chemicals.
Pro tip: Always do a patch test first to ensure you don’t have an allergic reaction.
Next up, Lemon-sugar sealant spray. This simple mixture keeps the henna paste moist, helping you achieve a darker stain. The recipe’s straightforward: two parts lemon juice to one part sugar.
Shake well before using.
For aftercare, Coconut oil or a natural balm is what you need, they’re the best way to keep your skin moisturized and make your henna design last longer. Once the paste comes off and the stain’s fully developed, apply a thin layer. That’s all. Simple maintenance shifts everything.
If you’re just starting out, adhesive stencils are worth trying. They’ll help you nail clean shapes without the shaky hand problem. That confidence boost? It’s real. Press them down hard on clean, dry skin, hard enough that they won’t shift, and you’re done. That’s it.
Speaking of skin, Inai simple cantik starts with good prep work. You’ve got to clean the area thoroughly, and I mean thoroughly, then let it dry completely. No lotions, oils, or anything else getting between the henna and your skin. That’s the difference. A design that lasts versus one that fades in days. It all comes down to what you do before the needle touches down.
Happy henna-ing!
5 stunning & easy henna designs for beginners
Henna’s a gorgeous form of self-expression, and it doesn’t require years of practice. Here are five designs that beginners can actually pull off.
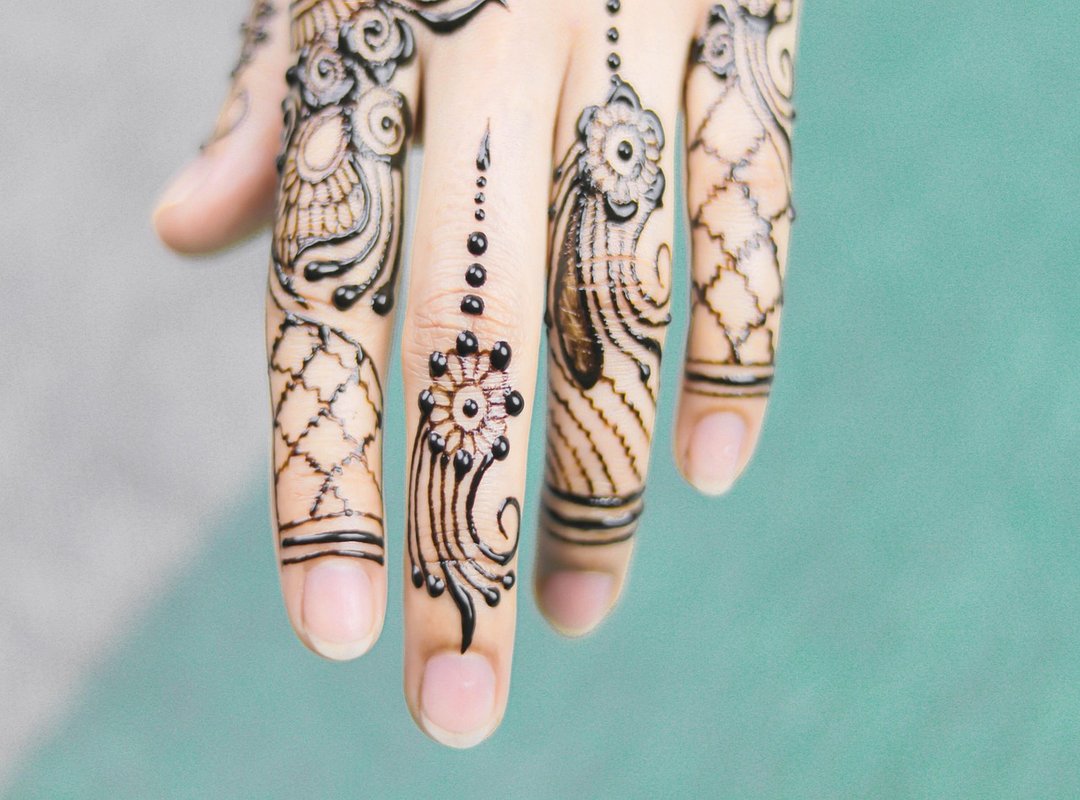
The Trailing Finger Vine starts simple. A leafy vine at your finger’s base winds upward, curling toward the nail with natural movement. Delicate work, sure, but the effect is genuinely striking when it catches light.
Add a few dots for some extra flair. It’s a delicate and elegant look.
Design 2: The Minimalist Mandala. Start by putting a dot right in the center of your hand or palm. Then draw a circle of petals around it, or use teardrop shapes if that’s what calls to you. The choice is yours, really. What matters most is that you’re creating something symmetrical, something that feels balanced and intentional from that single point outward.
This design is impactful yet easy to do. Perfect for those who love simplicity.
Design 3: Simple Finger Accents, and focus on decorating just the fingers. Use bands, dots, and chevrons to create patterns on each one. inai simple cantik
Leave the rest of the hand bare for a modern, minimalistic look. It’s inai simple cantik.
Design 4: The Wrist Cuff. Draw two parallel lines around your wrist like a bracelet. Fill the space with crisscross lines, dots, or scallops.
It’s a versatile design that can be as simple or complex as you like.
Design 5: The Crescent Moon and Stars. A delicate crescent moon sits on the side of your wrist or back of your hand. Scattered dots, tiny starbursts, really, represent the stars around it. Simple. Elegant. The kind of tattoo that catches light at just the right angle.
It’s a whimsical and charming design.
I hope these ideas inspire you to try henna. Remember, practice makes perfect. And if something doesn’t turn out quite right, don’t worry.
It’s all part of the learning process.
Secrets to a darker, longer-lasting henna stain
Patience is key, and honestly, it’s non-negotiable. The henna paste needs to stay on your skin for at least 6-8 hours, or even overnight, for the dye to fully saturate. Rush it, and you’ll end up with a disappointingly faint stain.
When you’re ready to remove the paste, gently scrape it off. Don’t wash it with water right away, water’ll actually stop the oxidation process that darkens the stain, and you definitely don’t want that.
After you’ve removed the paste, keep it away from water for the first 12-24 hours. The stain matures during this window, deepening into its final rich, reddish-brown color. Don’t rush it.
Heat’s actually your friend here. A little steam on fresh paste, gentle stuff, deepens the color like nothing else. Just don’t burn yourself in the process.
Keep your design looking simple cantik by moisturizing it regularly with a natural oil or balm, this protects against exfoliation and helps it last way longer. You’re essentially locking in the finish. A good routine makes all the difference.
By following these steps, you’ll have a beautiful, long-lasting henna design.
Frequently asked questions about simple henna art
How long will your simple henna design last? Typically, it’ll stick around for 1 to 2 weeks, though that depends on where you put it, your skin type, and how seriously you take aftercare. Palms and soles? They hold color way longer. Your forearm or neck fades faster. It’s all about friction, moisture, and whether you’re actually babying the design in those first 24 hours or just hoping for the best.
Black henna? No, absolutely not. It contains PPD, a harsh chemical dye that triggers severe skin reactions and scarring. Don’t use it.
Always use 100% natural henna.
Why isn’t my henna stain dark?
Common reasons include poor quality paste, not leaving it on long enough, or immediate exposure to water.
Can I practice before applying it to my skin?
Yes, highly recommend practicing designs on paper to get comfortable with handling the cone and controlling pressure.
inai simple cantik is a beautiful way to express creativity and personal style.
 Roberto Nicholselevarns has opinions about latest technology news. Informed ones, backed by real experience — but opinions nonetheless, and they doesn't try to disguise them as neutral observation. They thinks a lot of what gets written about Latest Technology News, Gadget Reviews and Comparisons, Tech Tutorials and How-To Guides is either too cautious to be useful or too confident to be credible, and they's work tends to sit deliberately in the space between those two failure modes.
Reading Roberto's pieces, you get the sense of someone who has thought about this stuff seriously and arrived at actual conclusions — not just collected a range of perspectives and declined to pick one. That can be uncomfortable when they lands on something you disagree with. It's also why the writing is worth engaging with. Roberto isn't interested in telling people what they want to hear. They is interested in telling them what they actually thinks, with enough reasoning behind it that you can push back if you want to. That kind of intellectual honesty is rarer than it should be.
What Roberto is best at is the moment when a familiar topic reveals something unexpected — when the conventional wisdom turns out to be slightly off, or when a small shift in framing changes everything. They finds those moments consistently, which is why they's work tends to generate real discussion rather than just passive agreement.
Roberto Nicholselevarns has opinions about latest technology news. Informed ones, backed by real experience — but opinions nonetheless, and they doesn't try to disguise them as neutral observation. They thinks a lot of what gets written about Latest Technology News, Gadget Reviews and Comparisons, Tech Tutorials and How-To Guides is either too cautious to be useful or too confident to be credible, and they's work tends to sit deliberately in the space between those two failure modes.
Reading Roberto's pieces, you get the sense of someone who has thought about this stuff seriously and arrived at actual conclusions — not just collected a range of perspectives and declined to pick one. That can be uncomfortable when they lands on something you disagree with. It's also why the writing is worth engaging with. Roberto isn't interested in telling people what they want to hear. They is interested in telling them what they actually thinks, with enough reasoning behind it that you can push back if you want to. That kind of intellectual honesty is rarer than it should be.
What Roberto is best at is the moment when a familiar topic reveals something unexpected — when the conventional wisdom turns out to be slightly off, or when a small shift in framing changes everything. They finds those moments consistently, which is why they's work tends to generate real discussion rather than just passive agreement.